Flirt Pole Training for Safe Prey Drive and Impulse Control
By Sofia Martínez • 2nd Sep
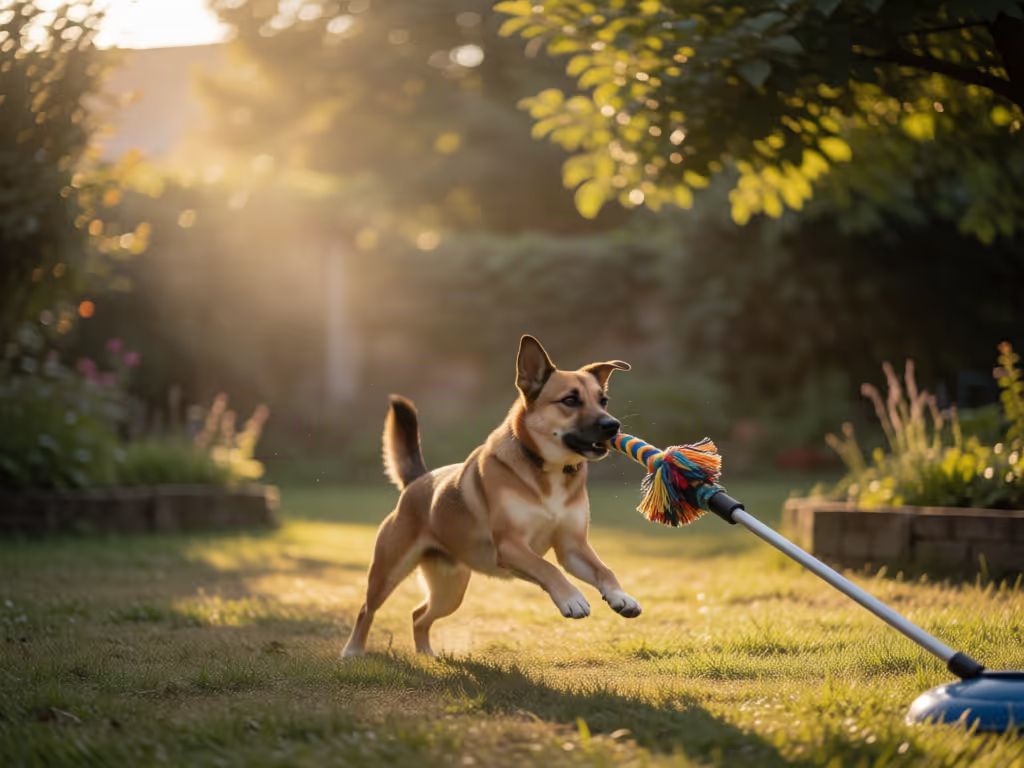
What to do
Use a flirt pole as a short, cue-controlled game—not a way to exhaust your dog. Build the pattern: wait, chase a low ground-level lure, catch, release, and settle, ending with a clear "all done" cue and the equipment put away.
- Start with: Check the equipment, choose grass or earth, avoid jumping, and skip strenuous chase for growing puppies or dogs with orthopedic concerns unless a veterinarian approves it.
- Then: Practice one easy start cue, release to a brief chase, allow a brief catch, cue “drop it,” and restart only with an easy cue-to-chase repetition.
- Important prerequisite: Supervise use. Do not use the equipment for extended periods without breaks and access to drinking water. If overheating signs appear, begin cooling immediately.
Important: There is no independently validated universal session length, catch schedule, or proof that flirt-pole play improves reactivity, anxiety, or hyperactivity.
Flirt pole training can give you a structured way to practice chase, release, and calm recovery with your dog, without turning the session into frantic, unstructured motion. The most useful dog flirt pole exercises are not about making a dog run until they drop. They are short, supervised reps in which access to the moving lure follows a cue, followed by a clear finish.
If your dog becomes bright-eyed at squirrels, toys, or fast movement, that does not make you a bad guardian or your dog a "problem." It simply means the setup matters. A safe plan protects the body first, then builds a predictable pattern: wait, chase, catch, release, settle. Teams learn together.
Small wins, stacked safely, build calm, confident teams.
Before You Begin: Pass the Safety Gate
Before starting prey drive games, pause and consider the safety setup.
Choose the right dog, place, and day
Use this checklist before every session:
- Choose an open outdoor area with grass or earth when possible. One manufacturer specifically recommends these surfaces for its equipment.
- Keep the lure low and moving along the ground. Do not invite jumping. Jumping can be hazardous, particularly for dogs under one year whose bones are still growing.
- Skip high-intensity chase work for growing puppies. Puppy growth plates are sensitive and can be injured by strenuous exercise. Let young dogs play at their own chosen pace rather than pushing a workout.
- Do not use a flirt pole for a dog with known joint or hip problems unless a veterinarian has said it is suitable. Dogs recovering from orthopedic surgery also need professional clearance and structured reconditioning.
- Check the weather. Excessive exercise in warm conditions can cause dogs to overheat quickly, so review our hot-weather training safety guide. Choose a cooler time or choose a quieter indoor training alternative instead.
- Inspect the equipment. Look over the line and attachment before use. Do not use damaged gear, prevent chewing on the bungee or line, and put it away afterward.
- Do not attach a hard or heavy lure to the bungee cord. Keep hold of the pole when your dog catches.
One manufacturer recommends briefly walking your dog before and after use to help prevent muscle strains.
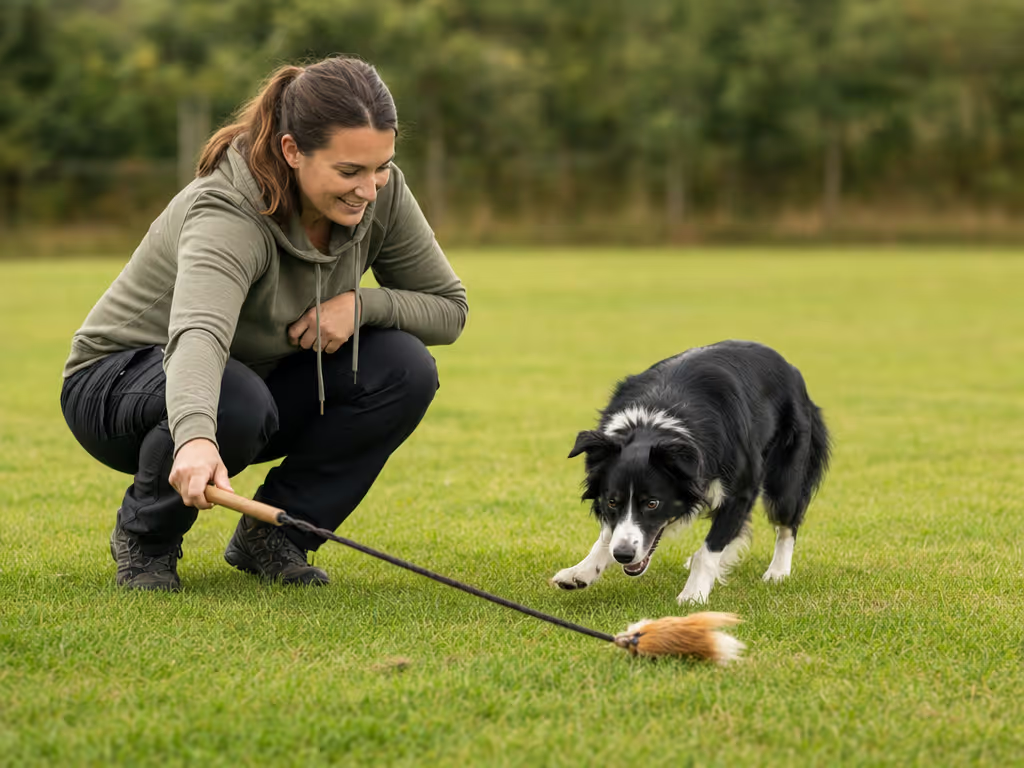
Know when to stop
Heat needs an especially fast response. Panting that worsens into distressed or noisy breathing, agitation, seeking shade or water, drooling, red gums or tongue, vomiting, or diarrhea can be early heatstroke signs.
If you suspect overheating, begin cooling immediately in a cool, ventilated place, offer small voluntary sips of water, and use water cooler than the dog with air movement where appropriate (avoid ice-cold water). Then transport your dog and seek veterinary advice. Do not try to "finish the round."
Set Up Your Cues Before the Chase
The heart of impulse control training with a flirt pole is not the lure. It is the repeatable cue sequence around it. Your dog does not need a perfect sit or down; they need a cue they can perform easily in a low-distraction space.
Prepare four simple cues:
- Start position: "Sit," "down," or "wait."
- Release: a consistent word such as "get it".
- Release from the lure: "drop it" or your existing trade cue.
- Finish: "all done", followed by the pole being put away.
Keep your posture quiet and clear: stand with soft knees, shoulders down, and the pole low. Avoid leaning over your dog or making large, frantic arm circles. The goal is to make the rules obvious, not to make the lure impossible to catch.
Your first stage gate
Before you add movement, check this:
- Can your dog offer the start position while the lure is still?
- Can they notice the lure without immediately grabbing for it?
- Can you deliver the release cue once, rather than repeating it?
If not, make the picture easier. Put the lure farther away, shorten the expectation, and reward the stillness with a treat or calm praise. In one small apartment hallway, a ten-step calm walk toward a door was the breakthrough, not a big outing. The same principle applies here: shrink the task until success is easy to repeat.
Step-by-Step Flirt Pole Training
Step 1: Practice stillness with a quiet lure
Place the lure on the ground and stand still. Ask for your dog's familiar start position. When they can hold it briefly, use your release cue and let them move toward the lure.
At this stage, you are teaching that the game begins through you, not through grabbing. If your dog launches before the release, quietly reset. There is no need for a correction. Simply make the next rep simpler.
Move on when: your dog can wait for your release on several easy repetitions.
Step 2: Add a short ground-level chase
After the release cue, drag the lure in a low, smooth path across the ground. Keep the movement modest. Let the lure be catchable rather than whipping it around your dog's body.
Commercial trainer guidance sometimes suggests very short chase rounds with rests, but no universal, independently validated timing exists. Let your dog's ability to respond and recover set the pace. Build in breaks and access to drinking water rather than treating continuous activity as the goal.
Handler checkpoint: Can you keep your feet mostly planted and your movements slow enough to avoid creating sudden, tight turns? If not, reduce the space and speed.
Step 3: Allow a brief catch
Let your dog catch the lure periodically. A catch is part of a fair game, not a failure of control. Hold the pole securely; do not yank the lure away or create a pulling contest.
Pause, then cue "drop it". When your dog releases, either restart with an easy cue-to-chase repetition or end the game. Manufacturer instructions commonly use this catch-and-release pattern, but there is no proven ideal catch schedule. Read your individual dog rather than chasing a number.
Move on when: your dog can release with your established cue and reorient to you.
Step 4: Add a reset between chases
Now build the most valuable transition: after the release, place the lure still on the ground and ask for the start position again. Your dog learns that excitement can be followed by a pause, and a pause can lead to another opportunity.
Keep this stage simple. Use the "all done" cue and put the equipment away when you end the game. Trying to physically exhaust a dog who cannot calm themselves can be counterproductive.
Step 5: End deliberately and help your dog come down
Say "all done", put the equipment fully away, and take a quiet walk or move to a calm activity. This clear finish matters. It separates game time from the rest of the day and avoids leaving the lure available for unsupervised chewing.
For dog conditioning with flirt pole goals, think quality of movement and recovery, not endurance. Optional low-intensity exercises such as controlled sit-to-stand transitions or backing up can support body awareness, but they are separate skills, not a substitute for individualized veterinary guidance. For broader guidance on safe exercise choices, see our canine fitness basics.
Adjust the Plan When Excitement Outruns Learning
Keep sessions simple and change one part of the setup at a time.
Try one adjustment at a time:
- Make the lure still before asking for the start position.
- Reduce chase distance and speed.
- Increase rest and water breaks.
- Practice the release cue away from the pole with an easier toy.
- End after one clean cue-to-catch-to-release cycle.
- On a hot day, skip the game entirely.
Do not use this activity as a promised cure for reactivity, anxiety, destructive behavior, or hyperactivity. The available guidance does not establish those outcomes. A better target is observable: Can my dog respond to one familiar cue, take a break, and finish with the equipment put away?
FAQ: Safe Flirt Pole for Dogs
Are flirt poles safe for dogs?
Safety depends on how the equipment is used. Manufacturer instructions call for active supervision, intact equipment, outdoor use on grass or earth, ground-level lure movement, breaks and drinking water during extended use, and avoiding jumping. They also say to keep hold of the pole when the dog catches and not attach a hard or heavy lure to the bungee cord. It is not a suitable high-intensity activity without veterinary guidance for dogs with joint or hip problems, dogs recovering from orthopedic surgery, or growing puppies.
How long should a dog play with a flirt pole?
There is no evidence-based universal duration. Commercial guidance varies, including conflicting recommendations from the same publisher. Use breaks and access to drinking water during extended use rather than treating a commercial schedule as a universal standard.
Do flirt poles tire dogs out?
No independent source here tests whether flirt poles tire dogs out. The goal should not be to exhaust your dog. One trainer cautions that, for a dog already in a highly aroused state, adding more exercise can work against calm behavior. Prioritize short, successful cue-and-recovery reps instead.
Your Next Step: Run One Easy Sequence
At your next appropriate outdoor practice, do just this: inspect the pole, walk briefly, ask for one easy start position, release to a low moving lure, allow a brief catch, cue the release, say "all done", and put the equipment away.
Write down what happened: Did your dog wait? Did they release? Was the equipment put away after? That tiny record gives you a kind, practical stage gate for the next session. Calm, consistent reps build confidence at both ends of the leash.
Related Articles